Thursday, May 29, 2014

The Inside Begins to Take Shape

We are now at a stage in where the major elements of the house structure are all completed and we begin to see the individual elements take shape.  Each day new items are installed and we move closer to closing. The first items which have been installed into the house are the cabinets, doors and banisters.  In our latest pass through the house we were shocked all these items were already in.

Cabinets


We stuck with the base model cabinets for a couple reasons, first of course is cost, and second the oak wood look of them is something we liked.  It was something that had not happened too often, where the base model was actually the one we would have chosen anyway.

The primary location of the cabinets in the house is the kitchen.  Our selection of the optional gourmet island, which is really more of a peninsula than an island, adds a pair of large cabinets.  The cabinets of the gourmet island comes out on a twenty-five to thirty degree angle from the end of the half wall we have seen in a number of the kitchen pictures from prior posts.

Picture of the kitchen cabinets with gourmet island before the counter is installed
Kitchen Cabinets - Gourmet Island

To the right are the cabinets which will form the base of the sink, separated from the cabinets under the gourmet island by a gap which will ultimately house the dishwasher.  In the corner further to the right of the sink is a cabinet which houses a lazy Susan.  It is at this point where the above counter cabinets begin as well.  
Picture of the kitchen cabinets before the counter is installed
Kitchen Cabinets

Beyond the corner is a run of cabinets both above and below where the counter will reside leading up to the location where the range will go as well as a wall installed microwave.  You will notice that in this cut out area is a set of cabinets reaching all the way to the ceiling.  Cabinet 9 feet above the floor, will be tough to really utilize, but it looks good.  According Jackie our sales rep, this cabinet alignment is a new feature as part of the base setup.  Previously the cabinets would have ended where you see the small cabinets begin about a foot from the ceiling.

Picture of the kitchen cabinets before the counter is installed as viewed from the family room
Kitchen Cabinets - View from Family Room
A small section of cabinet in the kitchen separated from the rest are those which will be situated around the refrigerator.  There is a set of small cabinets directly above where the refrigerator will ultimately reside. Additionally there is one cabinet above the counter and one below the cabinet to the left of the refrigerator. This location is one of the few areas where there is power hooked up, as you can see below there is an extension cord.  If you remember in the post where we looked at the basement with drywall there was a yellow extension cord powering the sump pump, well this is the source.  It wraps around from the kitchen, down the hall, then the steps and into the unfinished section of the basement.


Picture of the kitchen cabinets around where the refridgerator will be before the counter is installed
Kitchen Cabinets - Around the Refrigerator 
The second place the cabinets are are the two full bathrooms.  In the bathrooms Ryan Homes utilize the same cabinets in the base option as used in the kitchen.  The setup is a single cabinet on the right with a few drawers on the left.


Picture of the upstairs hallway bathroom cabinet
Cabinets - Hallway Bathroom

The master bathroom has the same cabinet as seen in the picture above, in the base option it is a single cabinet with a double wide counter, the side closest to the wall does not have any cabinet underneath.  We did not want that setup so we had a second cabinet placed underneath.

Picture of double cabinets in master bathroom
Double Cabinet - Master Bathroom

Banisters


We talked about the banisters versus the base option of a capped wall in the drywall installation second floor post, but at the time there was only pictures of the temporary banisters placed in the house for safety.  On our most recent visit the temporary safety setup had been removed giving way to the final banister.  There are tow options for the spindles in the banister, white wood or black metal.  The wood spindles are less expensive than the metal, but still is a bit of a jump from the capped wall.

We had decided from early on that the bottom of the stair portion had to be banisters as we didn't like the idea of the capped wall.  So we originally asked for a custom price to have just the bottom of the stairs be banister and the top a capped wall.  Customized requests are not very affordable, as the price for that option came in just about two thirds the price of the full banister.  This made the decision easy we would just go with the full banister setup, as the price difference didn't make much sense.  As you will see the bottom banister makes up about a fifth or less of the total banister size.

Picture of the unfinished banister on the bottom of the stairs as viewed from family room
Banister at Bottom of Stairs
The banister on the top wraps around the the staircase on all sides from the loft on the one side and the entire hallway on the other.  I wasn't to sure about the banister in the loft area and thought the capped wall may look better there but that also would have been a custom job which would have most likely been priced out. Now that I am seeing the banisters in place, I am happy I didn't push for the loft side to be a capped wall. The light from the two windows in the loft and landing will radiate through the open banisters and fill the stairway.  The following are a few different angles of the banisters at the top of the stairs.

Picture of the unfinished banister on the top of the stairs as viewed from the loft
Banisters - View from the Loft

Picture of the unfinished banister on the top of the stairs as viewed from the end of the hallway
Banisters - View from the End of Hallway

Picture of the unfinished banister on the top of the stairs as viewed from the middle of the hallway
Banisters - Close View from Top of the Stairs

You may have noticed in all the pictures of the banister that the wood looks natural but dull, this is due to the banisters when installed are not finished.  They are finished onsite as one of the final items done.  They will ultimately match pretty close to the cabinets in the kitchen. 

Doors


The standard doors in the house are double panel look door, larger bottom panel and smaller top panel, which are hung on all interior doorways with exception of the one from the kitchen leading into the laundry room which is a is a slatted door.  The one door which they offered as an upgrade was the one leading to the basement which could have been a glass door.  We choose against that glass door option.  I took a picture in the third bedroom which captured the look of the doors in the house.

Picture of the third bedroom with doors installed
Third Bedroom - Doors
Up next will be a look at the tile in the bathrooms and later we will be taking a look at some of the flooring. 


Wednesday, May 28, 2014

Drywall Installation - Basement

The final post in the drywall installation series will focus on the basement.  The base model of the Florence does not include a finished basement, but for our neighborhood at the time we purchased there was a great incentive discount for the finished basement as long as we use NVR Mortgage, which is Ryan Homes affiliated mortgage company.  From what I have gathered in many blogs there is typically some incentive whether that be discounted finished basement in our case or in other a free finished basement or free granite counter upgrade in order to get you to use their mortgage company.

The basement there is a finished and 2 unfinished sections.  The finished section is at the bottom of the stairs and covers pretty much the full length of the house underneath the living room and family room.  

Finished Basement


The stairs descend down to large open area which houses the finished section of the basement shaped like a backwards "L".  The ceilings are high even where the duct work is run, no ducking required even for tall individuals.  The basement has lights standard as part of the finish option, but they are light fixture and not recessed lighting which would be an upgrade option.  We decided to stick with the standard fixtures, for our finished basement.

Picture of the finished basement with drywall installed
Finished Basement - View from back looking towards front

The front unfinished section can be seen in the right corner of the above picture, closed behind the wall and a door.  The doorway tot he larger unfinished section at the back of the house can be seen in the picture below. On the far wall in the picture you can see two outlets, one will be for the cable and one for an electric outlet.  We decided to place the TV connection there so that a TV could be seen from anywhere in the finished portion of the basement.  In the model they had it on the wall with the door, that you will see would be blocked from the angle in the picture below.

Picture of the finished basement view from front with drywall installed
Finished Basement - View from front looking at back
In the space where I took the picture above we plan to someday setup a pool table which there is plenty of room, as the basement is quite large.

Unfinished Basement


The unfinished section of the basement is divided up in two sections, the first is a small are at the front of the house in the corner under the living room.  This is an area which an optional powder room can be added, we decided against this as it is a little pricey and we are already gaining an extra one and a half bathrooms over our current house.  If you get the powder room, the area under the stairs has an ejection pump installed in a well.  That area is closed off and accessible through a door, in our scenario there is just a closed off wall under the stairs. In the front unfinished section there is access to the sewer line and the water line intake.

Picture of the finished basement showing the unfinished basement front section
Unfinished Basement - Front Section
The morning room addition not only comes with added floor space on the main floor but also a great bit of space added to the unfinished section at the back of the house.  This is the primary storage area for the house unless you upgrade the attic into a finished attic and the added space makes for plenty of room unless you are a collector.  The unfinished section of the basement is wrapped with a fire retardant material to keep any potential fire, as can be seen in both the picture above and below.  The picture below shows the area added with the morning room addition. 

Picture of the finished basement showing the unfinished basement section under the morning room
Unfinished Basement - Under the Morning Room

In the back side of the unfinished basement situated under the kitchen and when applicable the morning room, is where the sump pump, hot water heater and furnace are all situated.  They are in a row across the front area of the section.  Just behind the hot water heater is the source of the Radon pipe we have seen in a number of pictures in past posts, which starts in the ground in the unfinished basement helping vent any radon before it builds up in the basement.  The furnace looks small in size for how big the house is, but the modern devices are much more efficient and do not need an over abundance of space.

Hot Water Heater
Furnace
The sump pump is hooked up, you cant see it but its there in the ground, and the crew has run a power cord down form the kitchen where they have already activated the power to get it supplied with power until the final electric is powered on in the basement.

Sump Pump
In the upcoming posts we will start to look at the different things as they get installed through out the the house.  In the next post the banister, cabinets, and some tile work is on deck.

Tuesday, May 27, 2014

Drywall Installation - Second Floor

As you are probably aware by now the second floor is accessed from the family room heading back towards the front of the house.  It leads to the loft and hallway which then connects on to the bedrooms in the house. We will look at these rooms now that the walls are up and get a feel for the second floor.

The Loft


The loft which will serve as an office area for us, is an open space at the top of the stairs.  It is a good size with plenty of room for a nice desk.  Other options one might do in this area would be an exercise room or sitting area, kind of an upstairs family room.  In the first look you will see the loft looking back from the top of the stairs.  I am not too excited about the electric layout, and some other areas as the electricians didn't put outlets next to the data and cable connections.  If you are building with Ryan and you have the chance I would ask if you can be there on the day of the wiring so that you can request this.  Its not the end of the world but it would make practical sense that if someone is adding a cable or data connection that they would need power at the same spot.  In the picture here the data connection is the one on the wall pictured in the left and the closest outlet is the one in the corner of the same wall.

Picture of a Ryan Homes Florence Model loft with drywall installed
Loft - View from Top of the Stairs
When looking back from the corner of the loft you can see the top of the stairs and get a real understanding of how much space it is and how big the are looks due to the openness.  The two windows bring light to the front of the house.  You will see a round opening in the ceiling just at the top of the stairs which will be for the light at the top of the stairs, safety feature so its included in the base.  Switching it to a recessed light would be an upgrade.


Picture of Ryan Homes Florence Model loft with drywall installed
Top Landing of Stairs - View from Loft

Bedroom 2 & 3


Immediately down the hall from the landing at the top of the stairs is bedroom 2 and then bedroom 3 separated by a linen closet.  These rooms are the hardest to get a good picture of, both are square of the same dimensions, good size for children's rooms.  In the model home both have a full bed in them and there is still room left over.  Either room with a twin in the corner would have room for a kid to have toys as well.

Bedroom 2
Picture of Ryan Homes Florence Model bedroom 2 view from the hallway with drywall installed
Bedroom 2 - View from Hallway
Picture of bedroom 2 view from inside the room with drywall installed
Bedroom 2 - View from Inside the room
Bedroom 3

Picture of bedroom 3 as viewed from the hallway with drywall installed
Bedroom 3 - View from the Hall
Picture of bedroom 3 view from inside the room with drywall installed
Bedroom 3 - View from Inside Room

Master Bedroom


The master bedroom including the bathroom covers the entire back of the house, a long rectangle with a walk in closet in one corner, and bathroom at the other.  In the center of the room we added a rough in to allow us to add a ceiling fan and light to the room.  The room is quite big I would highly recommend a rough in for light or fan with light or recessed lighting for the room.  A combination of the two could be a possibility as well.  The room definitely needs some overhead light though.

Picture of the master bedroom as viewed from the master bathroom with drywall installed
Master Bedroom - View from Master Bath
The above is a look at the room from the doorway of the master bathroom, in which you can see the optional window added to the end of the room.  On the right side of the picture you will see the entrance to the walk in closet.  The walk in closet is a great size in the floor plan with the loft, but seems to be a little small with the four bedroom layout as the back portion of it is used for the fourth bedroom closet. 

Picture of the master bedroom walk in closet with drywall installed
Master Bedroom Walk In Closet
The room has a small corner wall, which is the corner of the third bedroom  and behind that is the entrance to the master bathroom.

Picture of the master bedroom as viewed from the walk in closet with drywall installed
Master Bedroom - View from Walk in Closet Corner

The wall mount TV setup does not include the mounting bracket, which will be made clear by the wiring representative.  You will also need to sign off that you understand the same.  Additionally the extra electircal outlet needed to be ordered through the Sales Representative, so that there is power at the wall mount location. They setup the connections directly on studs as you can see from the lines of spackle on the wall in the following picture.

Picture of wall mount TV Hookup just after drywall installed
Master Bedroom - Wall Mount TV Hookup

Bathrooms


There are two full bathrooms on the second floor of the Ryan Homes Florence model, one in the hallway and one in the master bedroom.  The master bathroom has a number of different optional setups, the one shown as the default is a garden tub with a small standing shower.  In this arrangement there is no linen closet in the bathroom just one in the hall.  In the model we choose there is a large double shower, and linen closet.

Picture of the master bathroom as viewed through the doorway just after drywall installed
Master Bathroom - View from Bedroom
Picture of the master bathroom shower just after drywall installed
Master Bathroom - Shower
You may have noticed a very different looking drywall in the shower where the tile will reside.  This is because it is cement board, and not the typical drywall.  Cement board is better for holding up tile and providing a more water durable product than typical drywall or the old standard in bathrooms green board.
The hallway bathroom features a tub, toilet and vanity, and is situated just outside the master bedroom. Once again you can see the cement board application below.

Picture of the hallway full bathroom as viewed through the doorway just after drywall installed
Hallway Bathroom
Picture of the hallway full bathroom shower just after drywall installed
Hallway Bathroom - Shower
Just above the shower you will see a light, which in talking with Bob was an addition to the base floor plan due to customer feedback surveys, as it was noted multiple times that there was not enough light in that shower.  This is one of the advantages of getting a model that has been available for sometime as you get improvements which have occurred due to consumer feedback.

Hallway and Stairs


The last part of the second floor closed up with drywall we will take a look at is the upstairs hallway and the stairway.  In both of the subsequent pictures you will see a temporary railing around the opening of the stairs. This is in place because we choose the railing with spindles for the entire upper portion of the stairs as well as the small portion on the bottom.  It all comes as a set.  If you stick with the default the area you see with temporary railing would all be a wall with drywall closed in and capped off.  The default setup is the hardest thing to see in a model or even on other Ryan Homes blogs.  We did find two examples of it and based on that one image we decided against it, as it didn't look right for us.  The following is our house in under construction and two examples of what a capped wall would like.

Picture of the upstairs hallway just after drywall installed
Second Floor Hallway
Capped Wall - Top of Stairs
(http://buildingourabode.blogspot.com/)

Capped Wall - Bottom of Stairs
(http://florencewithryanhomes.blogspot.com)
Back into our our house you can see where the railings will be going around the stair case.  In the picture you can see the the light travels through and whole hallway from the front windows, which is the nice part of the open railings as opposed to the capped wall.

Picture of the stairway between first and second floors just after drywall installed
Stairway

Attic


From the master bedroom walk in closet there is two access panels, one to the attic over the garage, and one to the attic over the remainder of the house.  The architecture of these are not designed for storage, but rather just for access for wiring or other service activities.  In order to have storage in the attic you need to upgrade and have a different architecture used to support storage.  If you get the morning room addition this is most likely not necessary as the space in the basement even with the finished basement option is quite sizable, and probably easier to get to, not pull down stairs.

In the attic areas they use a different method of insulating, instead of standard roll insulation they blow in the insulation.


Picture of the attic of the garage with insulation
Attic - Blown Insulation Measure

Attached to one of the vertical beams is a sticker with measurements on it, to allow them the ability to measure how much insulation has been blown.  

Picture of the attic of the garage with insulation
Attic with Blown Insulation

One final look at the Drywall installation will be coming which will look at the basement and some of the items contained within.

Friday, May 23, 2014

Drywall Installation - First Floor

The last time we were through the house it was for the pre-drywall walk-through with Bob our PM, this time my wife and I went over on a weekend, which the PM does not typically work.  In this case we stopped into the model home, to talk to our Sales Rep to get access into the house.  It had been a while since we had been over to the model, so we ended up getting into a long talk and catching up with our Sales Rep.  She confirmed the tentative closing date of June 20th, its getting closer and closer and seems to move faster each day.

The model home is also a Florence Model, so we took a few minutes, with the use of a borrowed polka dot measuring tape, and took some measurements for curtains.  After a pass through of the model it was on to our future home.  Upon arriving we came across the house all closed up for the first time and the driveway was installed.  The driveway and garage is sized for two cars tapered as it approached the street to a single car apron.   

Picture of the Ryan Home Florence Model being constructed with driveway installed
Driveway Completed

It is tough to see entirely but there is a decline from the house to the front a slight grade of approximately three percent allowing water to run off and move as much water away from the house as possible.  The trench is filled in where they buried the electric and it looks like they leveled out the rest of the yard a little, but much more work to do there towards the very end to finalize the landscaping.

Upon entering the house its a totally different feel with the drywall up no more seeing through the walls, but rather really getting to feel the end product. Once again I took whole lot of pictures, so I will be taking you through the house in a few posts, this time I will divide them up by the floor, this first post will be for the first floor, called the main floor on Ryan Homes' floor plans.  In the subsequent two posts I will take a look at the second floor and finally the basement.


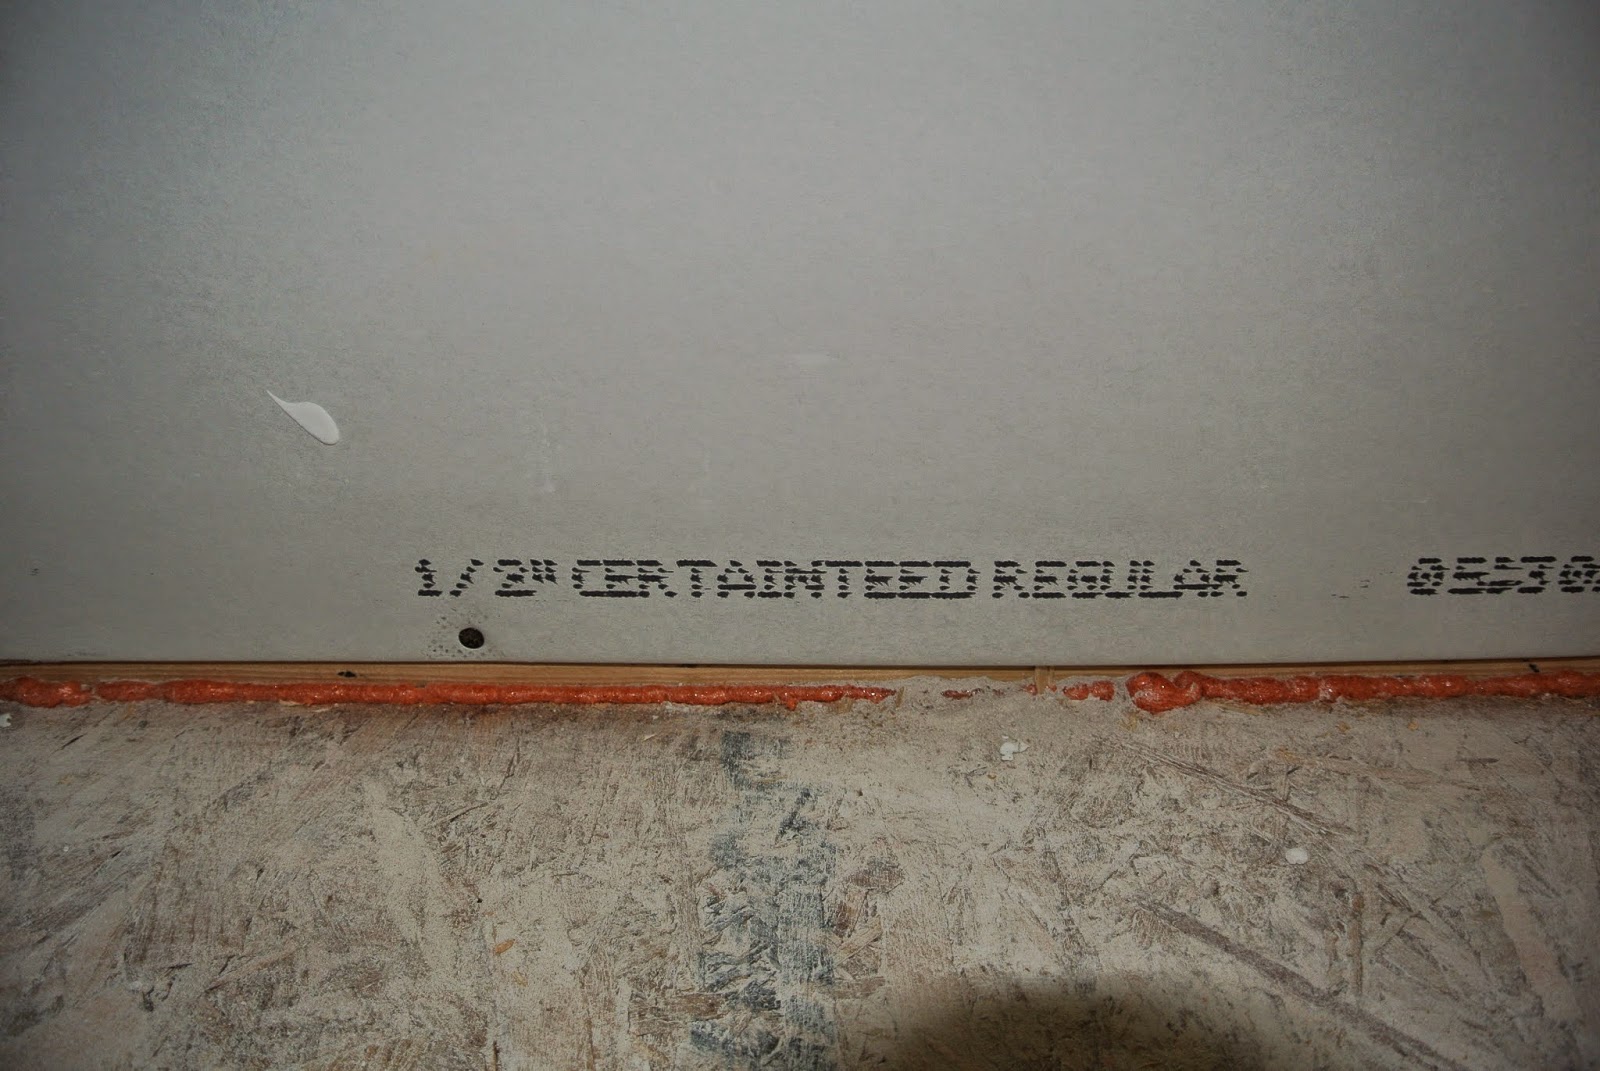
Picture of label on sheet rock indicating a half of an inch
1/2 Inch Sheet Rock
Not much to see in the above picture, but I wanted to show the label I saw on the walls, indicating the half of an inch sheet rock.  Important to know for future, in case there is ever a need for removal and replacement of the walls in future projects.

Living Room / Foyer


The first room we will look at is the living room and foyer, essentially the front entrance way to the house. On the Ryan Home floor plan this area is noted as two rooms, part of the open floor plan, but in reality it really is one room providing the gateway between the back of the house, the front door and basement access.

Living Room - Looking to Back of House
Living Room - Basement Entrance
The first two pictures above take a look from the front corner of the living room, looking towards the back of the house.  You can see the basement entrance towards the right in both pictures.  One of the offers available to us was a deep discount on the finished basement as long as we used Ryan Home's mortgage company NVR.  The deal was too good to pass up, so this path will be used to access that part of the house.  The one thing I noticed with the drywall is applied horizontal runs rather than vertical, which comes across as a straight line through the center of the wall, looks very clean with the lines covering the screw holes.
  
Foyer (Living Room)
The front door as seen above, is the standard door on the homes, at least in our development is the the three panel metal door, with the top panel being a window.  In front of the door is the foyer, mentioned earlier, it the area from the wall on the right where the basement stairs.

Living Room
The living view from the other angle and the nice double window, the room looks really big from this angle.  

Powder Room / Coat Closet

Between the front of the house and back of the house on the main floor is a small hallway containing a powder room at the end and a coat closet on the right.  This is the half bathroom in the house, and only one on the main floor.  This house does have one and half more than our current house so that will be a wonderful addition.  The doorway is the exposed two by fours from which the door frames will ultimately sit.

Powder Room
Powder Room / Coat Closet

Family Room


Once again I was amiss in my duties to capture photos of the family room, and only grabbed on view.  The picture is from the morning room looking back to the family room.  The ones I missed was from the stairway into the room and from the back corner towards the hallway up to the front of the house.  Since the family room, kitchen and morning room make are in a big open arrangement the picture taken from the other end of the family room really shows the kitchen.
Family Room
Here is that other view which shows the corner of the family room where it meets the base of the stairway from the second floor.  The window on the left is one of the two standard windows in the family room.  The morning room can be seen in the far left.

Family Room looking towards the Kitchen

Kitchen


The kitchen is one of the most important rooms in the house for its value and it purpose.  The kitchen in the Florence model is a great setup, the optional items in it allow you to set it up in many ways.  The kitchen sits between family room and morning room.  In the following views you can see the drywall in the kitchen as seen from both rooms.
Kitchen - View from the Family Room
Kitchen - View from Morning Room
The kitchen sink will sit along a half wall that divides the kitchen and morning room, featuring a morning bar above it.  In the picture below you can see the wall that will be behind the cabinets.  One thing to notice is the outlet which looks to be there by the plumbing, this must be for the garbage disposal unit.  The yellow wire I assume will be for the dishwasher.

Kitchen - Sink Area
One option we chose in the kitchen is the recessed lighting which we saw before the drywall went up, we now can see it with the ceiling in.  This will look really good, we chose this when we saw the default option in the catalog of kitchen options presented by Jackie our sales rep.

Kitchen - Pantry and Recessed Lighting
In the corner just off center of the above picture the angles room is the pantry, great size and sits between the counter and the refrigerator.  The refrigerator will be situated in the space just to the right of the pantry door opening.

Morning Room


The morning room was the most expensive option we added to the house but we felt it was a must have. Any opportunity to add additional square footage to the house as part of the initial build try and fit it into the budget.  An addition later one will cost much more, require an architect and leave a lot more room for issues.  
Morning Room - View from Kitchen
On top of the added space on the main floor the morning room comes with the added basement storage and the double window in the master bedroom.  The best feature though is the triple window and the light it allows into the open floor space.


Morning Room - View from Family Room

Laundry Room / Garage


The laundry room bridges the kitchen and the garage, which is a nice feature over our current setup with the laundry in the basement.  A small room it has a doorway on each side of the room.  The door separating the garage and laundry room is a fire door, and was already hung.  The door to the kitchen is a standard door, which is yet to be hung. 

Laundry Room - View from Kitchen
Laundry Room - View from Garage

In the final room, if it could be called that on the main floor is the garage, Ryan finishes with drywall, the walls which share a wall with the inside of the house, the one facing the outside is only finished around the electircal box.  This can be seen a little bit in the picture below on the right side you can see the exposed beams.

Drywall in The Garage
The garage being about two feet taller than the other rooms of the house required two full runs of sheet rock and a portion of a third which can be seen by the lines of spake separating the sheets on the wall.

Garage Up Close
Coming next will be a subsequent post featuring the drywall covered second floor.