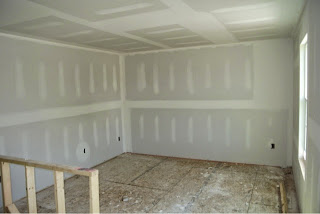
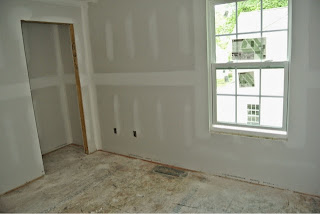
As you are probably aware by now the second floor is accessed from the family room heading back towards the front of the house. It leads to the loft and hallway which then connects on to the bedrooms in the house. We will look at these rooms now that the walls are up and get a feel for the second floor.
The Loft
The loft which will serve as an office area for us, is an open space at the top of the stairs. It is a good size with plenty of room for a nice desk. Other options one might do in this area would be an exercise room or sitting area, kind of an upstairs family room. In the first look you will see the loft looking back from the top of the stairs. I am not too excited about the electric layout, and some other areas as the electricians didn't put outlets next to the data and cable connections. If you are building with Ryan and you have the chance I would ask if you can be there on the day of the wiring so that you can request this. Its not the end of the world but it would make practical sense that if someone is adding a cable or data connection that they would need power at the same spot. In the picture here the data connection is the one on the wall pictured in the left and the closest outlet is the one in the corner of the same wall.
 |
| Loft - View from Top of the Stairs |
When looking back from the corner of the loft you can see the top of the stairs and get a real understanding of how much space it is and how big the are looks due to the openness. The two windows bring light to the front of the house. You will see a round opening in the ceiling just at the top of the stairs which will be for the light at the top of the stairs, safety feature so its included in the base. Switching it to a recessed light would be an upgrade.
 |
| Top Landing of Stairs - View from Loft |
Bedroom 2 & 3
Immediately down the hall from the landing at the top of the stairs is bedroom 2 and then bedroom 3 separated by a linen closet. These rooms are the hardest to get a good picture of, both are square of the same dimensions, good size for children's rooms. In the model home both have a full bed in them and there is still room left over. Either room with a twin in the corner would have room for a kid to have toys as well.
Bedroom 2
 |
| Bedroom 2 - View from Hallway |
 |
| Bedroom 2 - View from Inside the room |
Bedroom 3
 |
| Bedroom 3 - View from the Hall |
 |
| Bedroom 3 - View from Inside Room |
Master Bedroom
The master bedroom including the bathroom covers the entire back of the house, a long rectangle with a walk in closet in one corner, and bathroom at the other. In the center of the room we added a rough in to allow us to add a ceiling fan and light to the room. The room is quite big I would highly recommend a rough in for light or fan with light or recessed lighting for the room. A combination of the two could be a possibility as well. The room definitely needs some overhead light though.
 |
| Master Bedroom - View from Master Bath |
The above is a look at the room from the doorway of the master bathroom, in which you can see the optional window added to the end of the room. On the right side of the picture you will see the entrance to the walk in closet. The walk in closet is a great size in the floor plan with the loft, but seems to be a little small with the four bedroom layout as the back portion of it is used for the fourth bedroom closet.
 |
| Master Bedroom Walk In Closet |
The room has a small corner wall, which is the corner of the third bedroom and behind that is the entrance to the master bathroom.
 |
| Master Bedroom - View from Walk in Closet Corner |
The wall mount TV setup does not include the mounting bracket, which will be made clear by the wiring representative. You will also need to sign off that you understand the same. Additionally the extra electircal outlet needed to be ordered through the Sales Representative, so that there is power at the wall mount location. They setup the connections directly on studs as you can see from the lines of spackle on the wall in the following picture.
 |
| Master Bedroom - Wall Mount TV Hookup |
Bathrooms
There are two full bathrooms on the second floor of the Ryan Homes Florence model, one in the hallway and one in the master bedroom. The master bathroom has a number of different optional setups, the one shown as the default is a garden tub with a small standing shower. In this arrangement there is no linen closet in the bathroom just one in the hall. In the model we choose there is a large double shower, and linen closet.
 |
| Master Bathroom - View from Bedroom |
|
 |
| Master Bathroom - Shower |
|
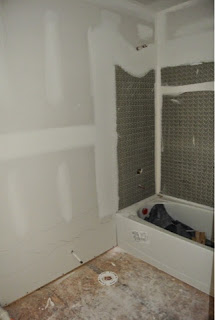
You may have noticed a very different looking drywall in the shower where the tile will reside. This is because it is cement board, and not the typical drywall. Cement board is better for holding up tile and providing a more water durable product than typical drywall or the old standard in bathrooms green board.
The hallway bathroom features a tub, toilet and vanity, and is situated just outside the master bedroom. Once again you can see the cement board application below.
 |
| Hallway Bathroom |
|
 |
| Hallway Bathroom - Shower |
|
Just above the shower you will see a light, which in talking with Bob was an addition to the base floor plan due to customer feedback surveys, as it was noted multiple times that there was not enough light in that shower. This is one of the advantages of getting a model that has been available for sometime as you get improvements which have occurred due to consumer feedback.
Hallway and Stairs
The last part of the second floor closed up with drywall we will take a look at is the upstairs hallway and the stairway. In both of the subsequent pictures you will see a temporary railing around the opening of the stairs. This is in place because we choose the railing with spindles for the entire upper portion of the stairs as well as the small portion on the bottom. It all comes as a set. If you stick with the default the area you see with temporary railing would all be a wall with drywall closed in and capped off. The default setup is the hardest thing to see in a model or even on other Ryan Homes blogs. We did find two examples of it and based on that one image we decided against it, as it didn't look right for us. The following is our house in under construction and two examples of what a capped wall would like.
 |
| Second Floor Hallway |
Back into our our house you can see where the railings will be going around the stair case. In the picture you can see the the light travels through and whole hallway from the front windows, which is the nice part of the open railings as opposed to the capped wall.
 |
| Stairway |
Attic
From the master bedroom walk in closet there is two access panels, one to the attic over the garage, and one to the attic over the remainder of the house. The architecture of these are not designed for storage, but rather just for access for wiring or other service activities. In order to have storage in the attic you need to upgrade and have a different architecture used to support storage. If you get the morning room addition this is most likely not necessary as the space in the basement even with the finished basement option is quite sizable, and probably easier to get to, not pull down stairs.
In the attic areas they use a different method of insulating, instead of standard roll insulation they blow in the insulation.
 |
| Attic - Blown Insulation Measure |
Attached to one of the vertical beams is a sticker with measurements on it, to allow them the ability to measure how much insulation has been blown.
 |
| Attic with Blown Insulation |
One final look at the Drywall installation will be coming which will look at the basement and some of the items contained within.


