Yesterday we explored the inside of the first floor, but left out the trip down stairs and upstairs for sake of not running one post on too long. So here is the first look at the inside of the basement and first floors.
As one might expect the basement was quite dark, there is very limited windows in the design, just a small one, maybe one foot by three foot in size, that is situated at the back of the foundation wall just below the morning room. I wish there was a few windows along the left side of the house to bring some natural light into the finished basement side, but that was not to be. We never asked about adding some since we were already budget maxed with the other upgrades, but if your building a Florence it might not be a bad thing to ask about.
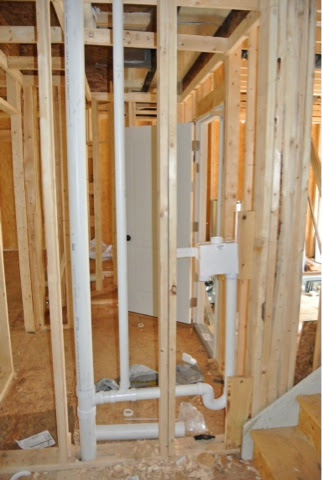
The frame for the finished basement walls are already up, and the drain plumbing was in but little else. The hot water heater had been delivered and sat in a dark corner of the basement. I tried to get my camera to take some pictures but couldn't pull enough light for it to work. Bob was able to help out by using a flashlight app on his cell phone in order for me to catch just a couple. The first is the area is where the hot water heater, furnace and sump pump will ultimate reside. Sorry for the blurriness not my finest work!
 |
| Unfinished Portion of the Basement |
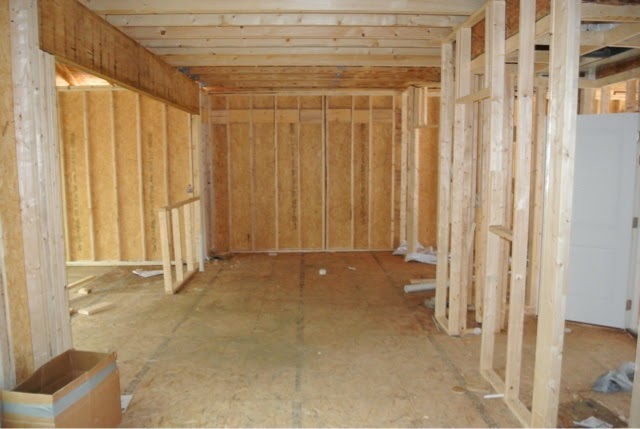
The second picture is taken from the base of the stairs looking into the finished portion of the basement facing the front of the house. You can see the wall for where the storage closet in the front of the basement will reside. additionally you can see the reddish color in the upper right portion of the picture this is a steel beam support running across the house surrounded by wood so that the walls can be finished.
 |
| Finished Side, or soon to be finished |
After checking out the basement we headed back up to the first floor and around to the back of the house into the family room. From there we went up the stair case to the second floor. At the top of the stairs off the the left, front right of the house when looking from outside, just above the garage is the loft area. The model home has the fourth bedroom option so this area is all walled off in it, so we never saw exactly what it looks like, still can't fully see it but it looks giant in the pre-drywall state.
 |
| Loft |
The area in back left of the picture will be the walk-in closet for the master bedroom. I spun to the left taking another picture from the same location, but you can see through to the back of the house, it gives you a good look at the full size of the house before the walls are up. Additionally you can see the tub has already been placed for the hallway bathroom and a good look at just how big the walk-in closet will be. It is bigger in the layout with the loft over the four bedroom version, as they take away a portion of it for the closet in the fourth bedroom. I think especially for us the loft was by and far the way to go!
 |
| Loft looking through walls at bathroom and master closet |
We moved around the stairs and down the hall towards the master bedroom situated at the back of the house and looking to the right we get another angle on the hallway bathroom. Looking in from the door, rather than through walls. You can see the tub and location of the drain for the toilet.
 |
| Hallway Bathroom |
After looking in on the bathroom, I took the first look at the master bedroom. Taking a look to the right from the doorway we can see the main area of the bedroom and the corner window. The corner window is one of the optional windows we chose, and I am happy we did it will bring much more light into the room. Off to the right is the entrance to the walk-in closet we saw through the wall from the loft picture.
 |
| Master Bedroom |
A look into that closet, wow that is big, much larger than the closet in our current house, they didn't use up much space for closets in older homes, but they sure do now. Looks to be a return vent in the upper right of the picture.
 |
| Walk-In Closet in Master Bedroom |
Next we took a look at the master bathroom, we chose the large shower stall and linen closet option. The garden tube seemed unrealistic for us, as we imagined how little we would use it. In speaking with Bob he mentioned that from what he has been seeing in Florence models this setup has become more of the normal scenario but with Milan models the garden tub still holds the lead. It will be nice to have the linen closet in the bathroom itself, in our current home its in the hall, and it can be annoying. This would be especially more annoying in this scenario as the other linen closet is in the hall between the first and second bedroom which would require you t go out down the hall to grab a towel. You can see in the following picture the shower basin and closet.
 |
| Master Bathroom |
The window for the bathroom will be on the wall just off to the left of this picture, and i am standing where the sink will be. The final look is down the stairs from the landing outside the loft looking into the family room. I missed taking pictures of the second and third bedrooms, I will get them next time.
 |
| Stairway |
Wow what a long post, guess it should have been a three parts!